Many data teams face the challenge of integrating data from Google Sheets into cloud data warehouses like Snowflake. Security is a major concern: not all companies are willing to make their documents public or grant access via personal accounts.
For Data Engineers, Analytics Engineers, Heads of Data, and BI specialists, a recurring goal is to free up engineering resources from the routine maintenance of brittle, in-house Python scripts that break with every API change and require constant attention.
Renta is a fully-managed cloud ELT service that automates the process of moving data from Google Sheets to Snowflake. The platform ensures reliable data delivery with automatic schema change tracking, built-in monitoring, and flexible, secure authorization options, including support for GCP Service Accounts.
In this guide, we'll walk you through the step-by-step process of setting up an automated data pipeline to load data from Google Sheets to Snowflake.
Prerequisites
Before you begin, ensure you have the following:
- An active Google account or GCP Service Account with access to the necessary Google Sheets documents.
- An active Snowflake account with write permissions.
You will need your connection credentials: server hostname, warehouse, database, schema, username, and password. The user must have permissions to create tables in the target schema. - A Renta account.
Sign up at Renta to get a 14-day free trial.
Step-by-Step integration guide
The Google Sheets to Snowflake integration process consists of four main stages:
- Add a Google Sheets source
- Add a Snowflake destination
- Create and configure the data pipeline
- Validate the data in Snowflake
Let’s dive deeper into each of these stages.
Add a Google Sheets source
Before building a pipeline, we'll configure the connection to Google Sheets in the Renta data catalog.
In the left sidebar, find the "Connections" section and click on "Catalog". This will open the catalog of all available sources and destinations.


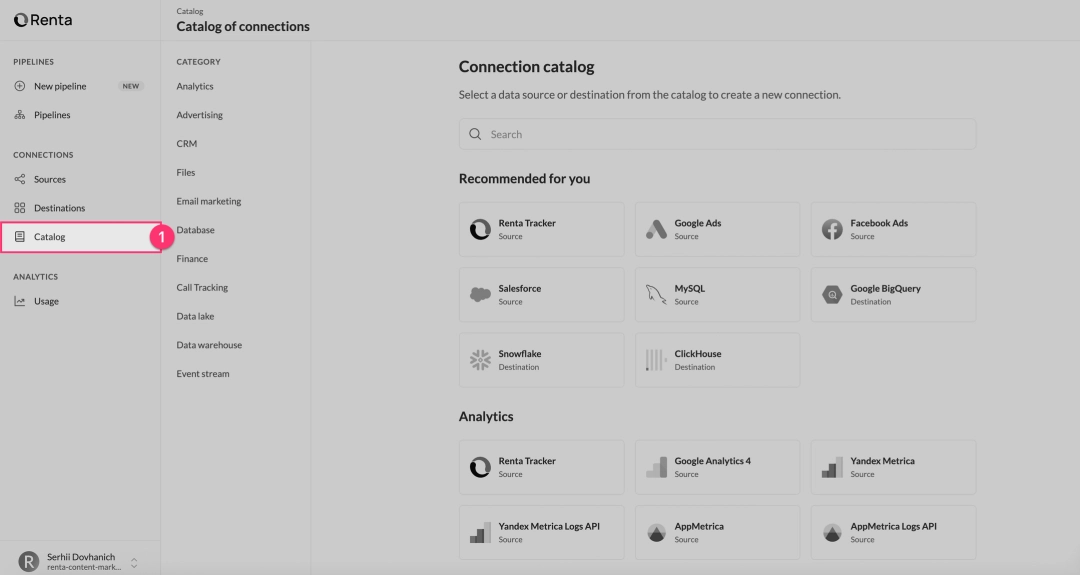
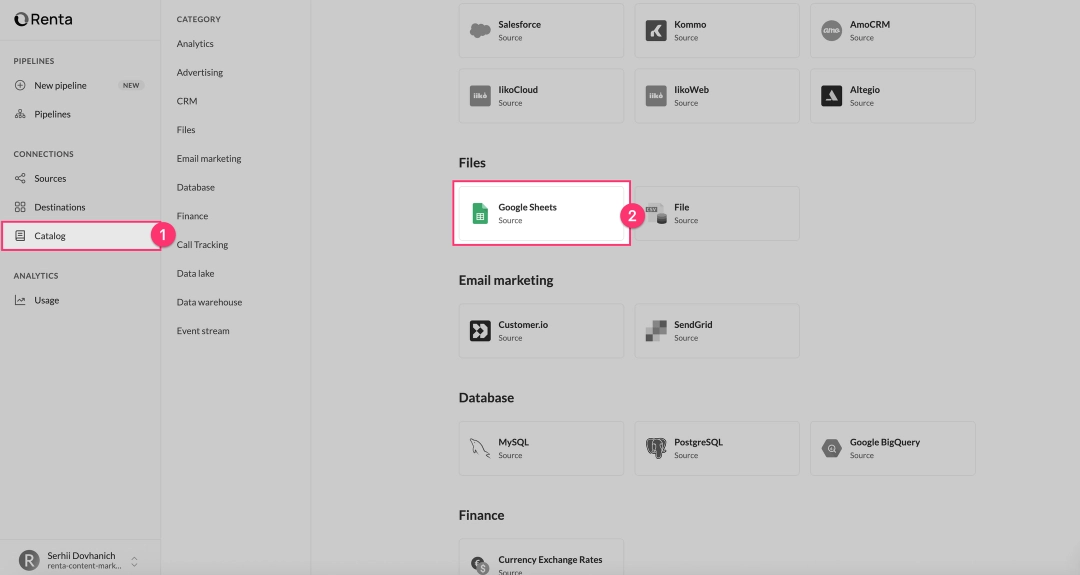
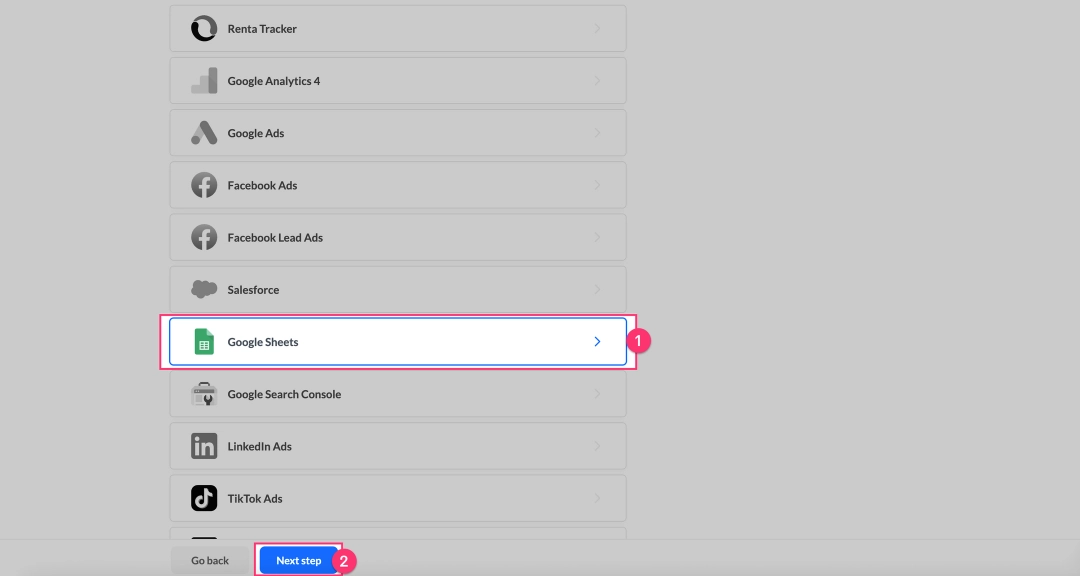
In the catalog, use the search bar or scroll down to the Sources section. Find and click on the Google Sheets card.

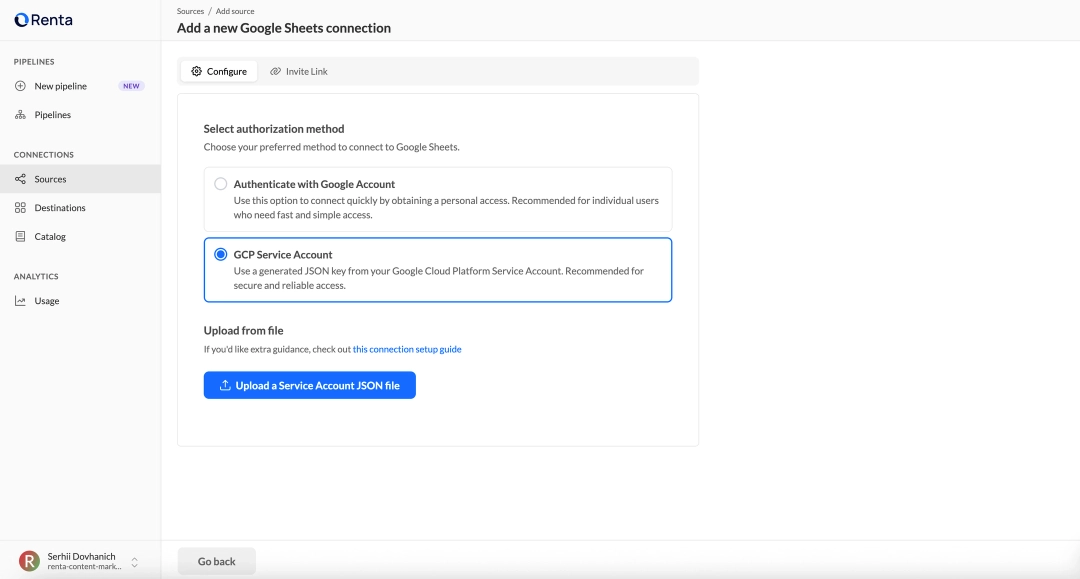
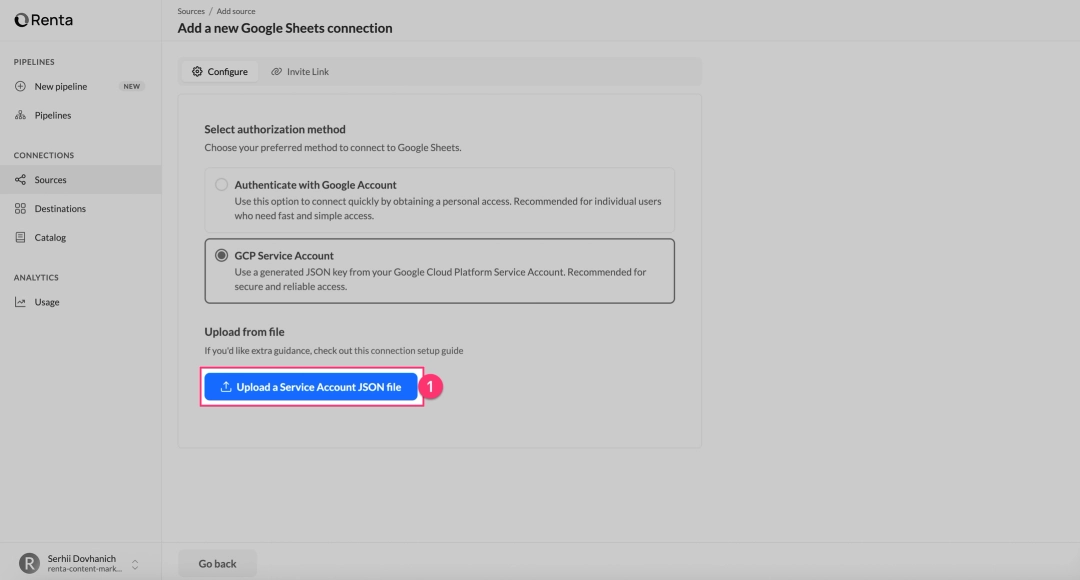
On the "Add Google Sheets connection" page, you are offered two authorization methods.
Method 1: Authenticate with Google Account . This is a quick authorization via OAuth, suitable for individual users and small teams. If you choose this, click "Log in to your Google Sheets account" and follow the standard Google auth flow.
Method 2: GCP Service Account. This is the recommended method for enterprise use, as it provides secure, centralized access without using personal accounts.
If you select GCP Service Account, follow the steps below to generate and upload the required JSON key.


In the Google Cloud Console, navigate to the main menu (☰), then select "APIs & Services" → "Library".


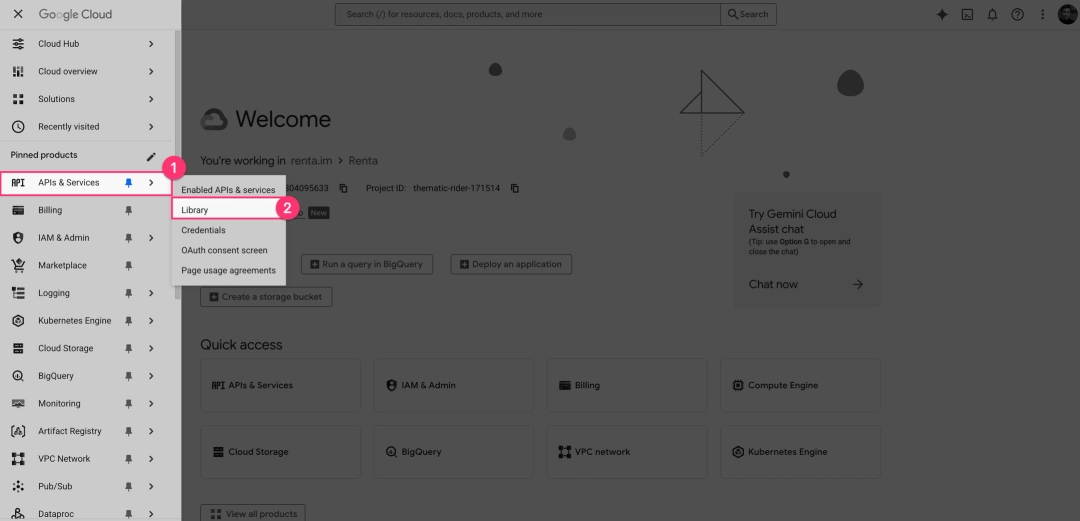
In the API Library search bar, type "Google Sheets API" and select it from the results. On the API page, click the "Enable" button if it's not already enabled.


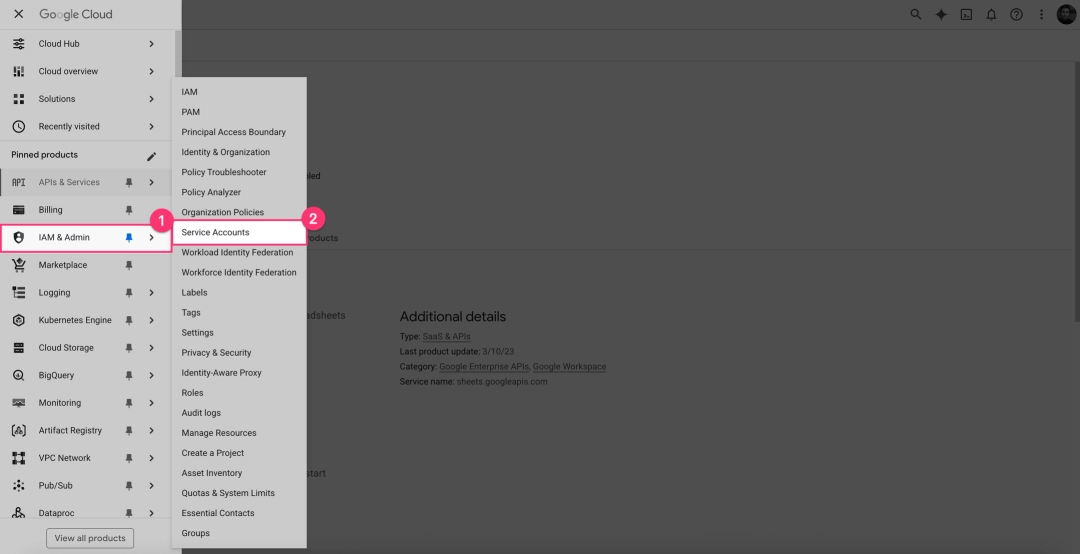
In the main GCP navigation menu (☰), go to "IAM & Admin" → "Service Accounts".


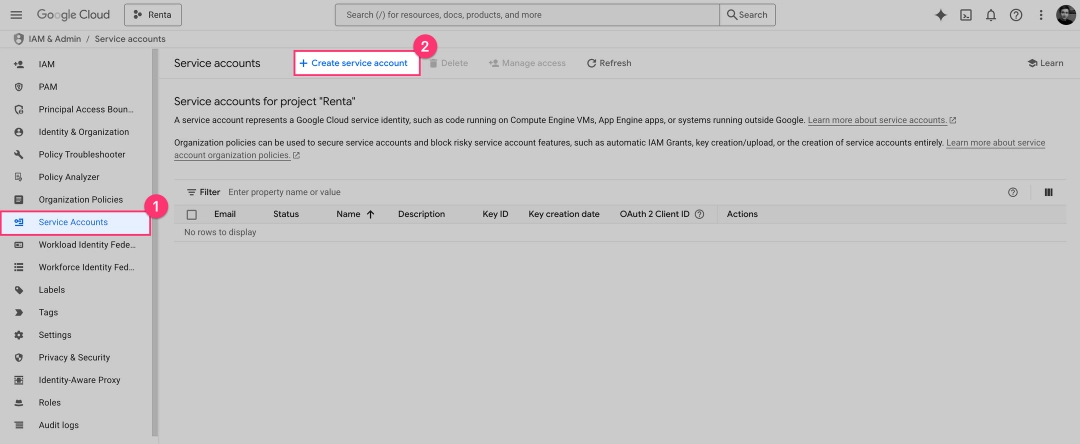
On the "Service Accounts" page, click the "+ Create Service Account" button at the top.


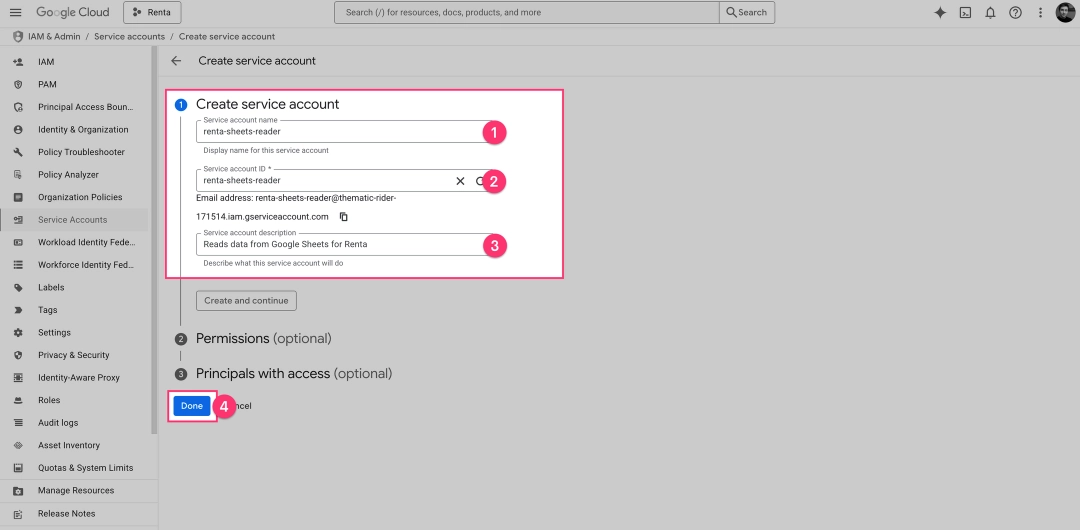
You will now see the "Create service account" form. You only need to fill in the first section.
Service account name.
Enter a descriptive name for your service.
Example: renta-sheets-reader
Service account ID.
This will be automatically generated based on the name you entered. You can leave this as the default.
Service account description.


You will be back on the "Service Accounts" list. Find the account you just created (e.g., renta-sheets-reader@...) and click on its email address to open its details page.

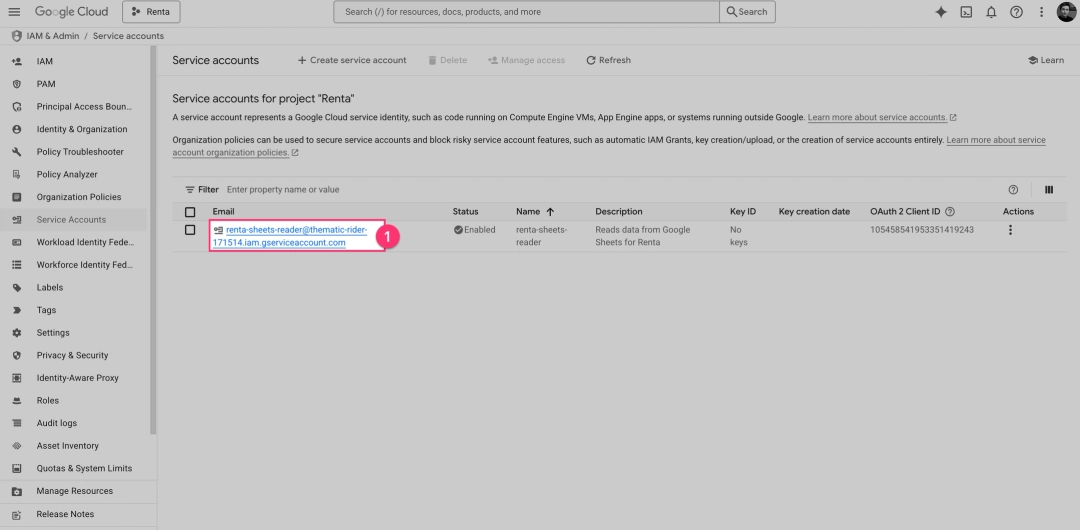
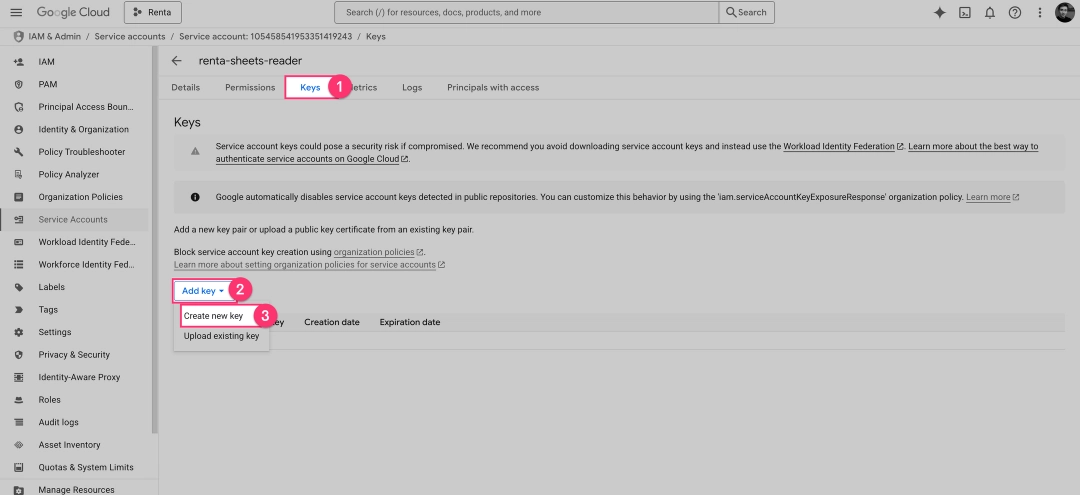
On the account's details page, click the "Keys" tab. Then, click "Add Key" and select "Create new key" from the dropdown menu.


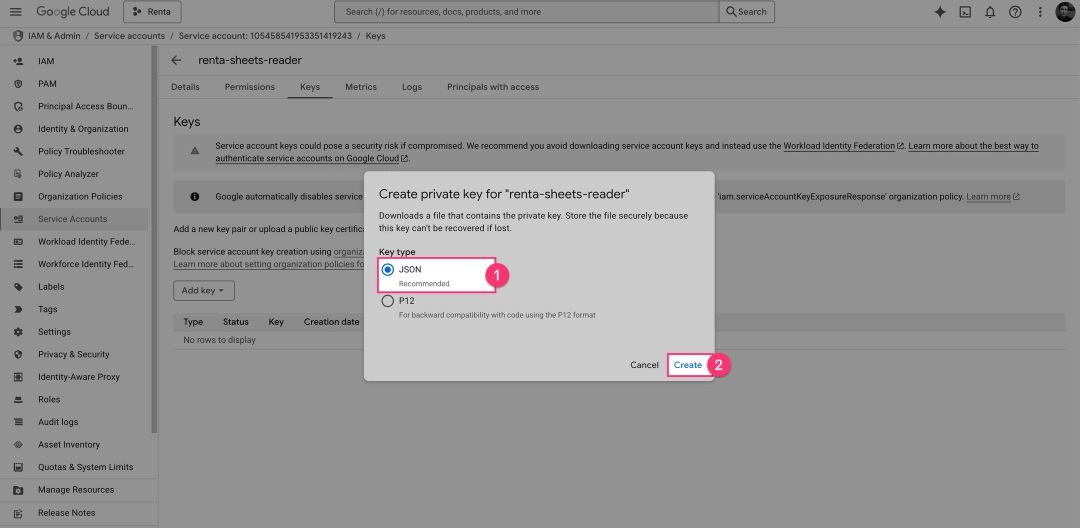
A pop-up will appear. Ensure the Key type is set to "JSON" (the default) and click "Create". Your browser will automatically download the JSON key file. Save it in a secure location.


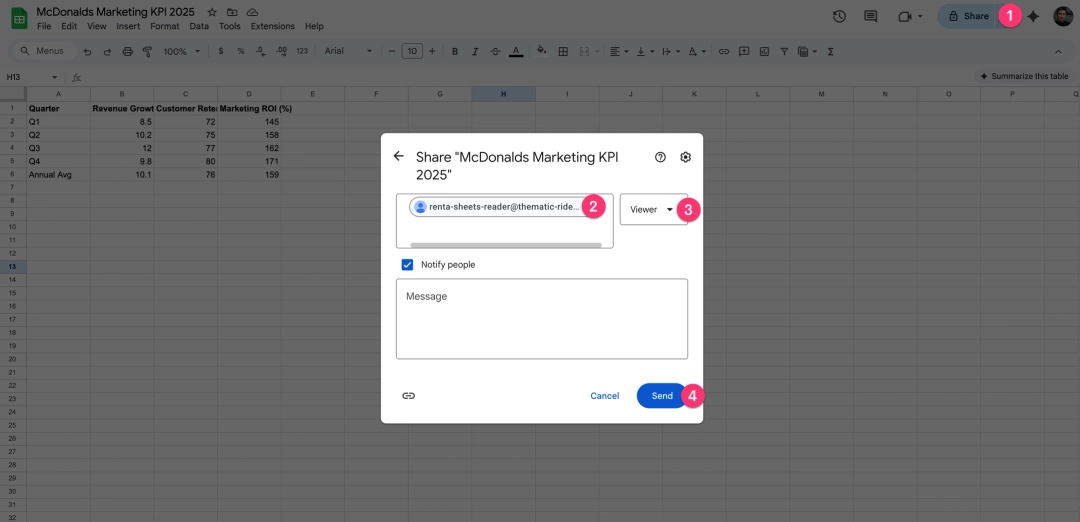
Copy the email address of your new Service Account from the GCP console. Open any Google Sheets document you want to sync, click the "Share" button, and paste the email. Assign the "Viewer" role and click "Share".


Return to the Renta interface. Click "Upload a Service Account JSON file" and select the key you just downloaded. After successful validation, you will be redirected to the connection configuration screen.


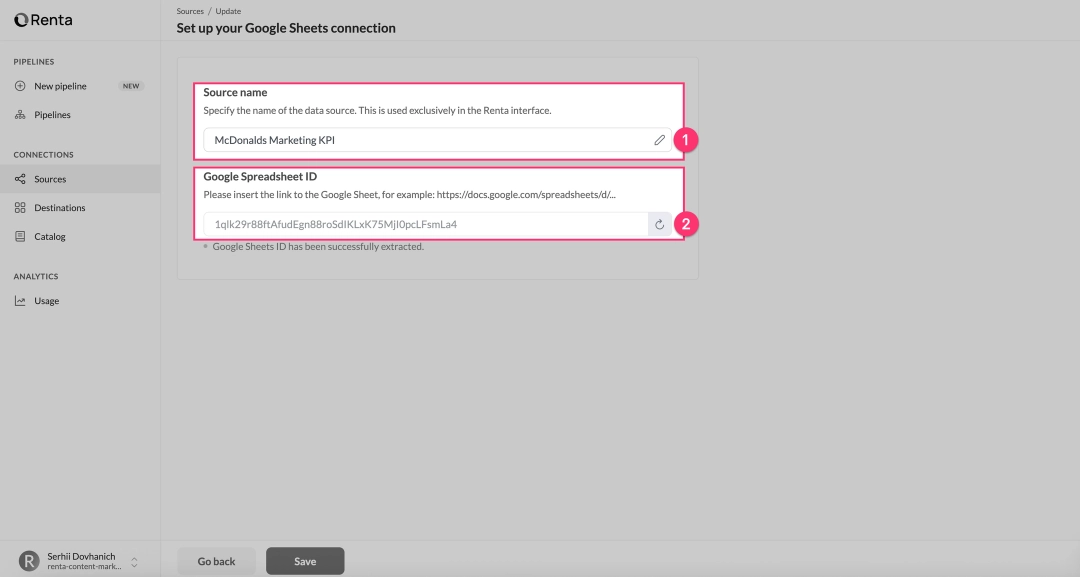
After authorizing (via either OAuth or Service Account), Renta will ask you to configure the connection.
Fill in the two required fields:
Source name.
Specify a unique, friendly name for this connection (e.g., McDonald's Marketing KPI 2025).
This name is only used in the Renta interface.
Google Spreadsheet ID.
In this field, paste the full URL of the Google Sheet document.
Renta will automatically parse the URL and extract the ID.
Once you have entered the name and URL, click the "Save" button. Your Google Sheets source is now fully configured and will appear in your list of available connections, ready to be used in a pipeline.


Add a Snowflake destination
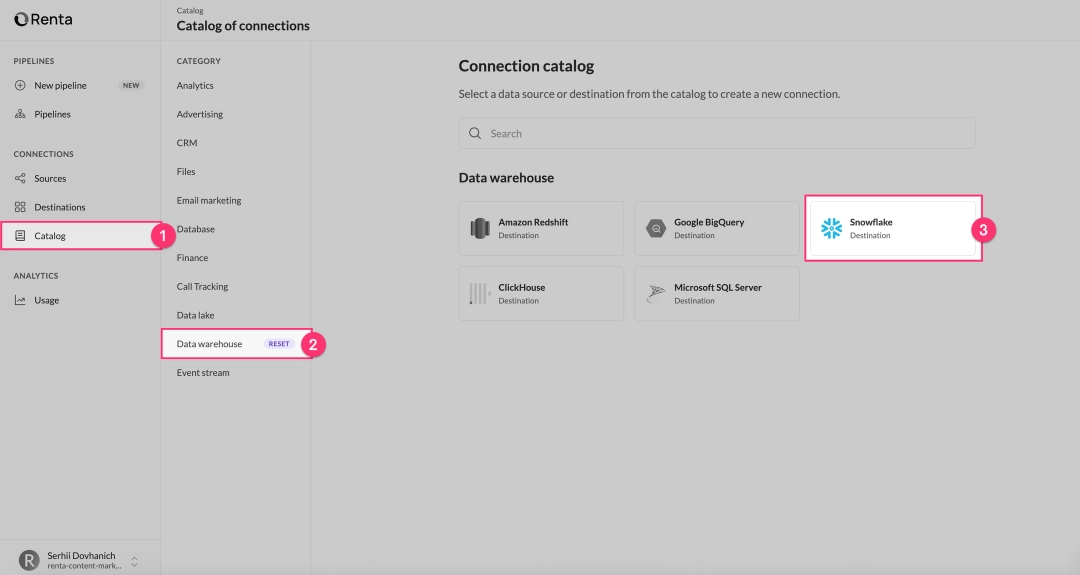
Go back to the "Connections" → "Catalog" section in the left sidebar.
In the catalog, scroll to the Destinations section or use the search. Find and click on the Snowflake card.

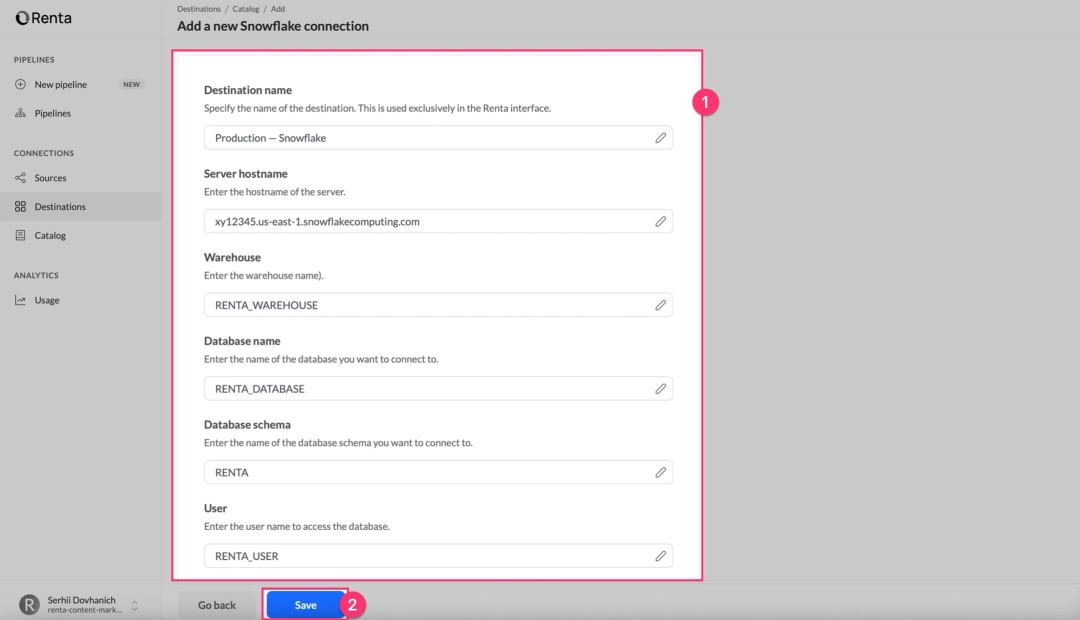
Fill in the following fields:
- Destination name. A friendly name for the connection in the Renta UI. Example:
Snowflake Production DWH. - Server hostname. Example:
https://y12345.eu-central-1.snowflakecomputing.com - Warehouse. The name of the Snowflake Warehouse to use for loading operations. Example:
RENTA_WAREHOUSE. - Database name. Example:
RENTA_DATABASE. - Database schema. Example:
RENTA_SCHEMA. - User. Example:
RENTA_USER. - Password. Example:
MY_PASSWORD.
For detailed step-by-step instructions, refer to the official Renta Snowflake Destination documentation.
It includes setup screenshots, permission requirements, and configuration best practices to help you get started in minutes.
After filling in all fields, click "Save". Renta will perform a test connection and, if successful, add the Snowflake destination to your list of connections.


Create and configure the data pipeline
Now that both connections are configured, let's create the pipeline to automate the data sync.
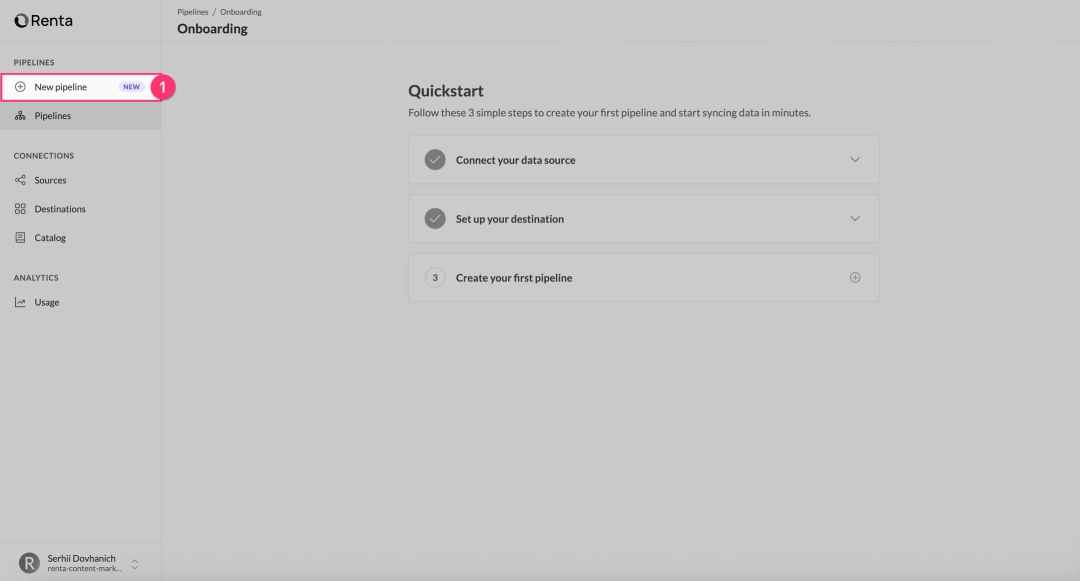
In the left sidebar, click on "New pipeline". This will open the pipeline creation wizard.


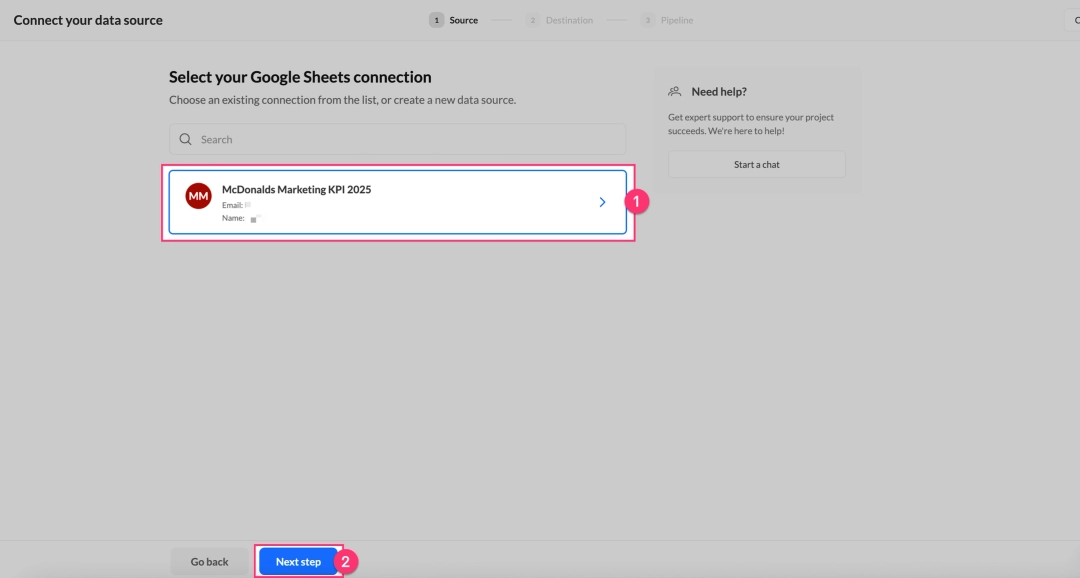
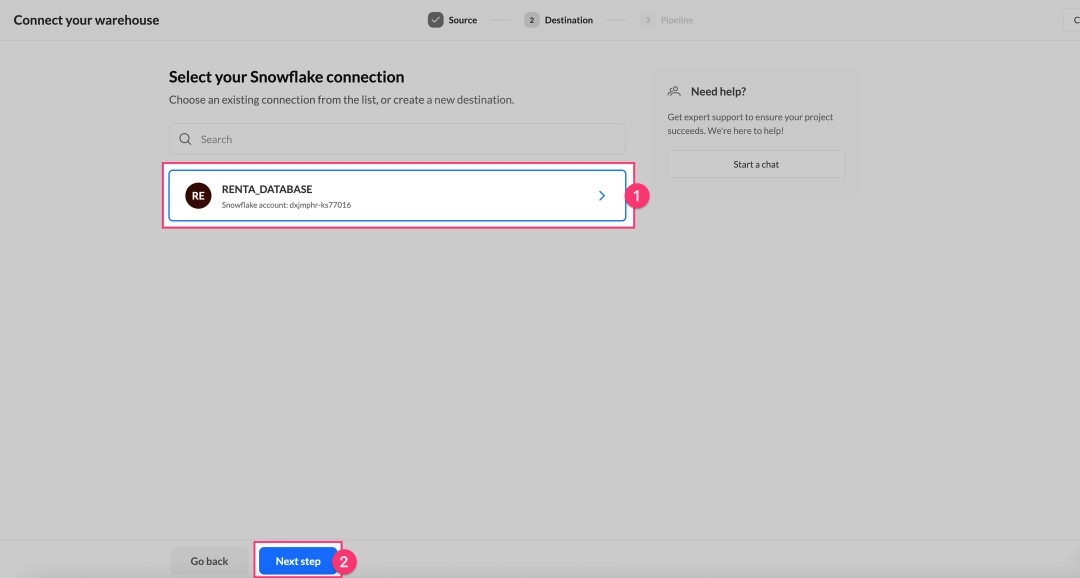
On the first screen, you'll see a list of your configured sources. Select the Google Sheets connection you created earlier and click "Next step".


Choose the connection that was created in the first step.


On the next screen, select your configured Snowflake connection and click "Next step".

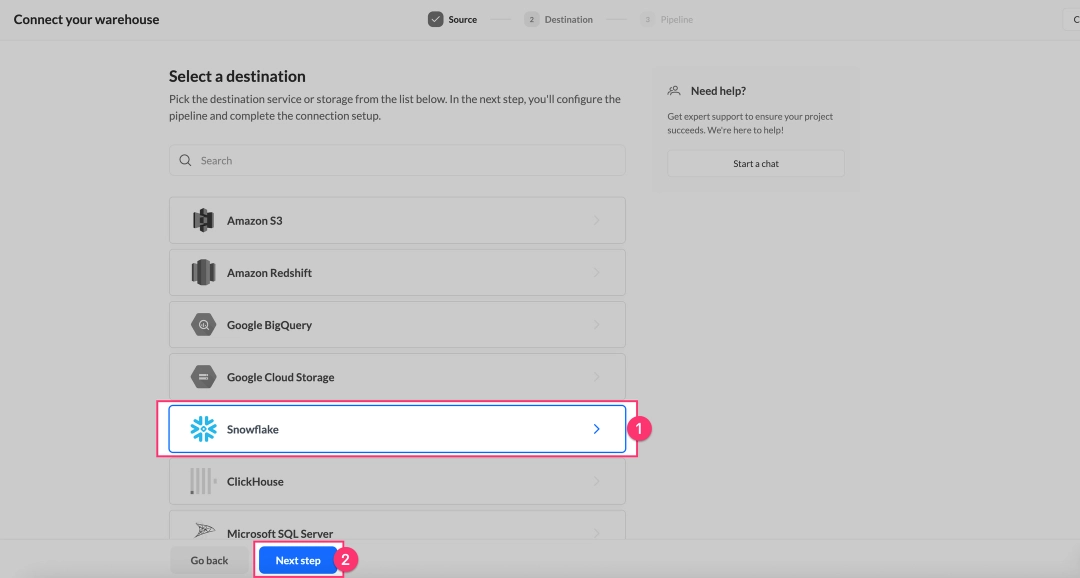
Choose the destination that was created in the second step.

On the final screen, we'll configure the pipeline settings.
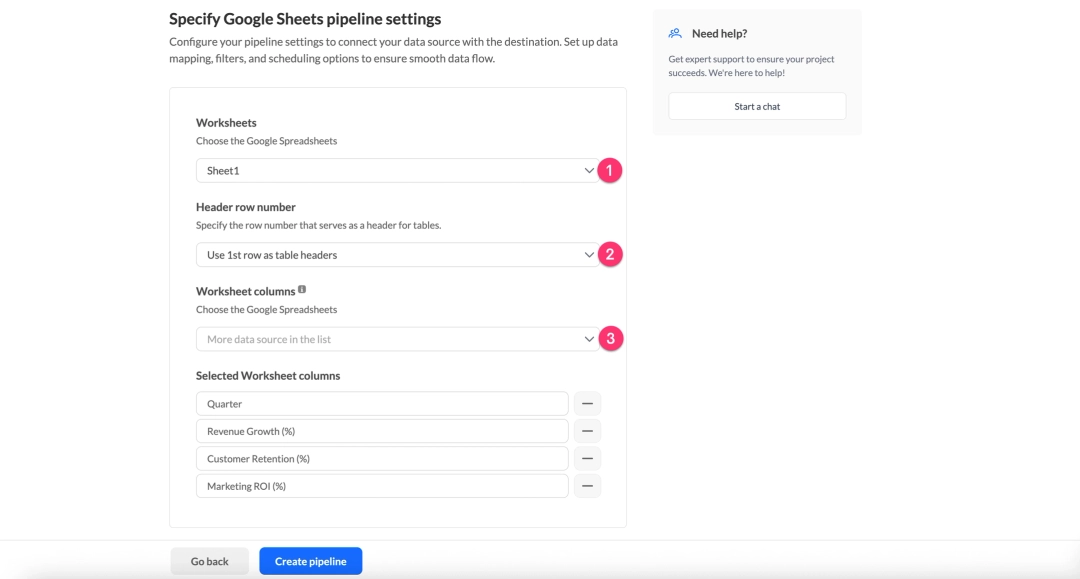
Select the Worksheet
In the Worksheets dropdown menu, select the specific sheet (tab) from your Google Sheets document that you want to sync. The current version works with one sheet at a time—to sync multiple sheets, simply create a separate pipeline for each.
Specify the Header Row
In the Header row number field, specify which row contains your column names. The default is "Use 1st row as table headers," meaning Renta will interpret the first row as column headers and start reading data from the second row.
Change this value if:
- You have metadata or descriptive text in rows above your headers.
- Your headers are not in the first row.
Select Worksheet columns
The Worksheet columns field allows you to select only specific columns to sync instead of loading all of them. Leave it empty to sync all columns.
Use this option to:
- Exclude helper or utility columns
- Filter out sensitive data (PII)
- Optimize data transfer volume

In the Integration name field, provide a clear, descriptive name to identify the pipeline in the UI. The default is "Google Sheets," but we recommend changing it.
Example: Marketing Budget Tracker.
In the Table name field, specify the name of the table that will be created in Snowflake. Renta auto-generates a name like google_sheets_[timestamp], but it's best practice to set a descriptive name.
Naming rules:
- Use snake_case:
sales_daily,marketing_budget_tracker_2025 - Use only letters, numbers, and underscores.
- Do not start with a number.
- Avoid SQL reserved words.

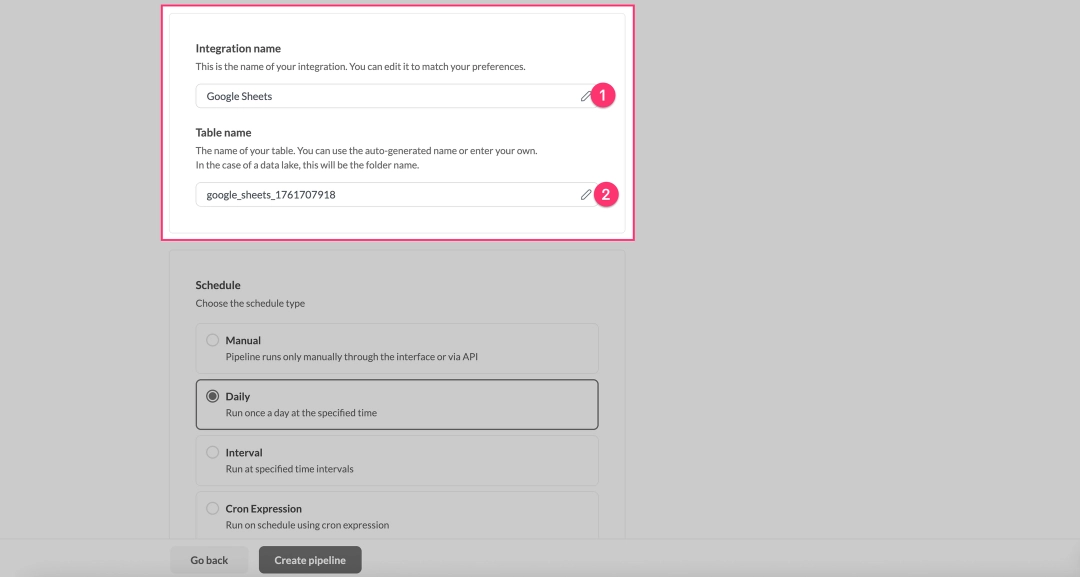
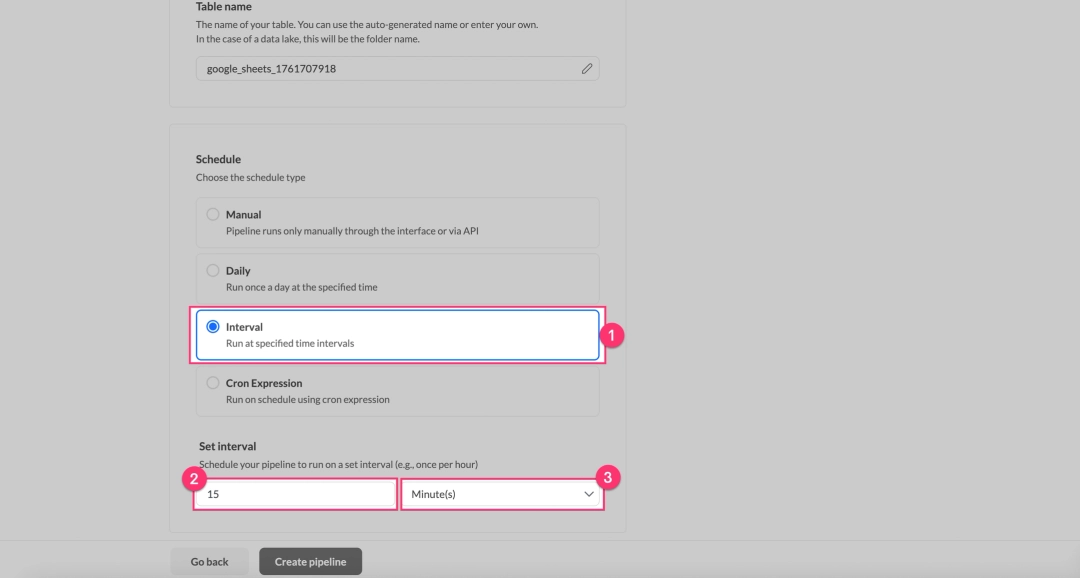
Choose one of the four schedule types:
| Schedule type | Description |
|---|---|
| Manual | Runs only when triggered manually via the UI or API. Ideal for one-time migrations, testing, or integration with external orchestrators (like Airflow or Dagster). |
| Daily | Runs once per day at a specified time. This is the most common option for daily reports. After selecting, specify the Update time (e.g., "3 AM"). We recommend off-peak hours (1-5 AM) so the data is fresh for the start of the business day. |
| Interval | Runs at a specified frequency (from every 15 minutes to once a week). Ideal for operational dashboards that require data freshness within an hour. |
| Cron Expression | For complex schedules (e.g., "every Monday at 9 AM," "at 3 AM on the first of the month"). |
After filling in all fields, click "Create pipeline". Renta will validate the settings, test the connections, create the pipeline, and redirect you to the pipeline's details page.

Validate data in Snowflake
After creating the pipeline, it's crucial to verify that the data has been loaded correctly into Snowflake.
If you selected a Manual schedule, or if you don't want to wait for the next scheduled run, click the "Run Now" button on the pipeline's page in Renta.


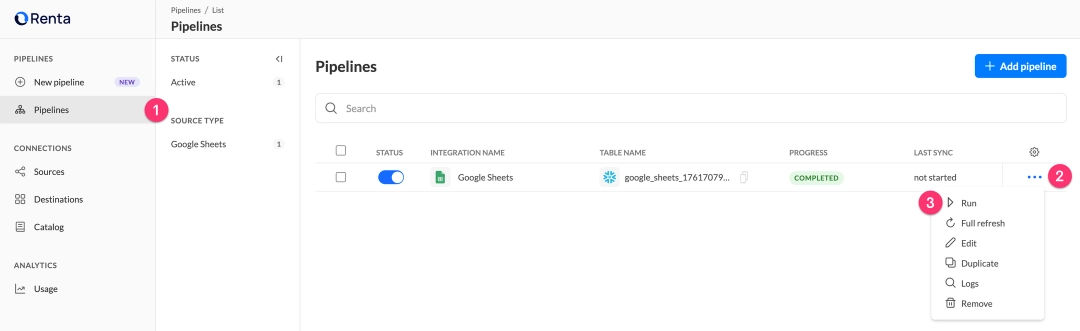
The pipeline's page will display the status of the current run: in progress, completed, or error.
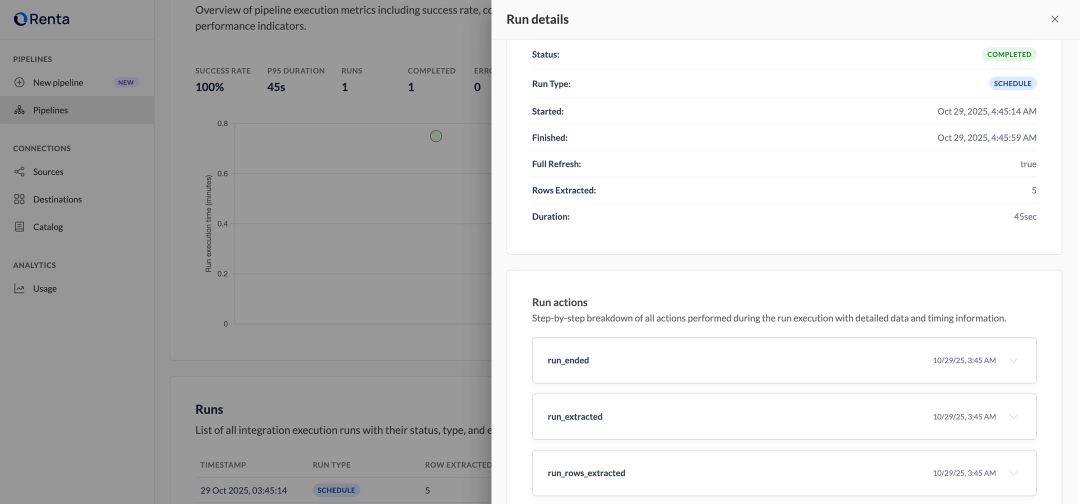
Detailed logs show each step of the execution:
| Status | Description |
|---|---|
| run_created | Pipeline initiated |
| run_started | Data extraction began |
| run_rows_extracted | Data extracted (with row count) |
| run_data_loaded | Data loaded into Snowflake |
| run_ended | Run finished successfully |
If a run fails, the logs will provide a detailed error message and recommended actions.


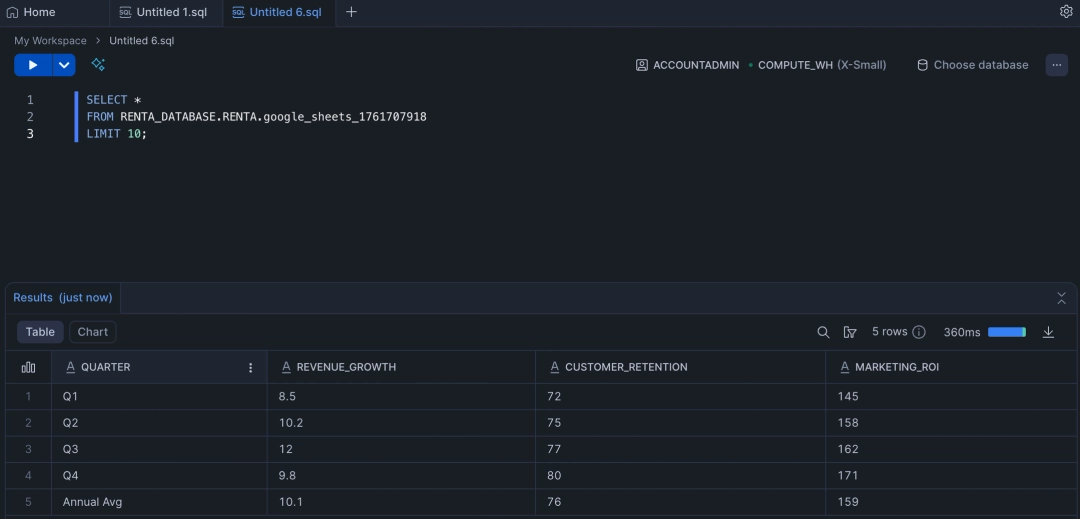
Open your Snowflake web interface or DB client and run a query:
-- Check if the table exists
SHOW TABLES LIKE 'your_table_name' IN SCHEMA your_database.your_schema;

-- Preview the first 10 rows
SELECT *
FROM your_database.your_schema.your_table_name
LIMIT 10;

-- Check the row count
SELECT COUNT(*)
FROM your_database.your_schema.your_table_name;
Verify that:
- The table was created with the correct name.
- The row count matches what you expect from Google Sheets.
- The column names match your headers from the Google Sheet.
- The data has been loaded correctly without distortion.


Advantages of using Renta to connect Google Sheets with Snowflake
Beyond simplifying the technical setup, Renta provides long-term reliability and significant resource savings compared to custom-built integrations. Here is a closer look at the financial and security benefits of using a managed ELT platform.
Build vs Buy Renta ELT solution
At first glance, a custom script seems "free." The real Total Cost of Ownership (TCO) includes development time, constant maintenance, and high opportunity costs.
Here is a more conservative TCO calculation comparing a "Build" vs. "Buy" approach for a single pipeline, using a blended engineer rate of $50/hour.
| Cost factor | In-House solution (Build) | Renta solution (Buy) |
|---|---|---|
| Initial Development / Setup | $1,000 (20 hours @ $50/hr) | $12 (15 mins @ $50/hr) |
| Annual Maintenance | $6,000** (10 hrs/month @ $50/hr) | $0 (Included in service) |
| Opportunity Cost (Lost Value) | High (Engineers on maintenance) | Low (Engineering time freed) |
| Annual Subscription | $0 (Excludes hidden infrastructure costs) | $1,200 ($100/month) |
| Total Year 1 TCO (Direct Costs) | $7,000 | $1,212 |
| Total Year 1 Savings | $5,788 (Over 82% Reduction) |
Breakdown of the "In-House" costs:
- Initial Development (20 hours): This is a conservative estimate for an engineer to write, test, handle auth, deploy, and document a robust script.
- Annual Maintenance (10 hours/month): This is the real hidden cost. It includes time spent debugging API changes, updating libraries, manually restarting failed runs, and investigating "silent failures."
Even with these conservative numbers, the direct TCO of the Renta solution is over 82% less in the first year.
This calculation also doesn't fully capture the value of the Opportunity Cost—the new, high-impact projects your engineers could be working on instead of maintenance.
Enterprise-grade security
Homegrown solutions often suffer from insecurely stored credentials, a-lack of audit trails, and unencrypted data transfer.
Renta's support for GCP Service Accounts allows you to control document access at a corporate level without using personal accounts. Access can be easily revoked by removing the service account's permissions.
All credentials are encrypted with AES-256 and stored in a secure secrets vault. Data is encrypted in transit via TLS 1.2+. A complete audit log of all actions helps you meet compliance requirements like SOC 2, ISO 27001, and GDPR.
Conclusion
Integrating Google Sheets into Snowflake is a common task, but the approach you take has long-term consequences for your team's efficiency and your data's reliability.
Key advantages of using Renta:
- Security & Control: GCP Service Account support is a critical feature for enterprises that cannot make documents public or use personal accounts.
- Speed to Value: A production-ready pipeline can be configured in 10-15 minutes, not days.
- Reliability: Automatic API and schema evolution tracking ensures your pipelines run continuously without night-time alerts or "silent failures."
- Observability: Full transparency into every run with detailed logs, metrics, and configurable alerts.
- TCO Savings: A significant reduction in total cost of ownership allows your data engineers to focus on building data models and delivering insights.
Sign up for a 14-day free trial of Renta and set up your first pipeline today (no credit card is required, and you get full access to all platform features).