


So you've built your data analytics stack, and now you get all the customer data you want — what's next? Now it's time to make that data work for you. Let's talk about data activation.
Renta helps companies collect data from their websites and apps and third-party tools. Today I want to show you what happens after the data has been gathered — how we use it not only for reporting, but to personalize our customers' experience with the product.
Using Renta's first-party tracking and server-side technologies, you can integrate streaming data with any business tool you can think of. It all comes down to the proper selection of tools. And I'm going to show you just that – the software that helps me create event streaming integrations in just a few minutes.
Table of contents
Why are we doing this?
In the perfect world, customers come to your website, browse for a while, and then perform the action you want them to — purchase your product, sign up for your newsletter, or create an account.
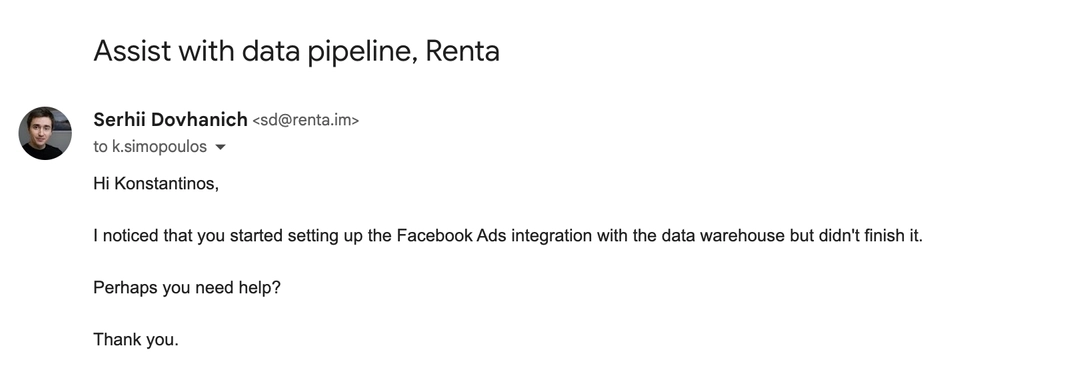
But in the real world, a lot of users quit halfway – they add items to a shopping cart and then abandon it, fill in their email for the newsletter but don't confirm the subscription, or, in my case, start creating an integration within Renta and don't complete it.
A follow-up message could go a long way. But who has the time to personally track all the unfinished actions and write emails? Here's where the magic comes in – you can automate the whole process. You build it once and then don't have to do anything but watch and enjoy.
For instance, here's what our customers receive when they start creating an integration in Renta but never finish it. In XX% cases, the customers complete the integration or ask our manager for help.


To set up the process that creates messages like this, we used just two tools – Renta's Javascript SDK and the Pipedream integration tool.
Let's see how we achieved this.
How does it work?
As I mentioned above, we need just two tools to set up the process:
Renta Javascript SDK. It's a first-party tracking tool for product and marketing analytics. It helps you track your website's user activity while bypassing third-party cookie restrictions. Javascript SDK can stream data to a data warehouse and any business tools.
Pipedream. This integration platform helps us connect pre-built API components and create custom integrations very quickly. In today's case, Pipedream will take event data from the Renta Javascript SDK and use it to sync data with the Pipedrive CRM.
We keep track of what users do in our product using Renta SDK. Then, we send this data to Pipedream where we can sync it with other business tools. Pipedream has over 900 ready-to-use connections and lets us execute custom Python code, which we will leverage in this process.
Before you start the tutorial, make sure that Javascript SDK is installed on your website. If you're not sure how to do that, here's a thorough tutorial.
How to create an integration using Renta Javascript SDK and Pipedream
This tutorial provides a step-by-step guide on how to stream data from the Renta SDK to Pipedream.
Step 1: Setting up a webhook data source in Pipedream
In Pipedream, create and configure a webhook trigger. To do this, go to the Workflows page and create a new workflow:


Finally, you need to copy the unique webhook URL to which you can stream tracking data from your site.
Step 2: Creating an integration in Renta
In Renta, go to the Integration catalog and create a new integration:
Your steps:
- Pick the Javascript SDK source and select your website (if you haven't set up tracking yet, use this tutorial).
- Select a webhook as the destination.
- Configure a new webhook destination: paste the unique URL created by Pipedream into the webhook configuration's host field.
- Specify integration settings. Let's take a closer look at this step.
On the integration setting page, you must specify what data should be streaming to the created webhook.
Integration Name
Choose any name you like.


This name will appear in the list of created integrations in the Renta interface.
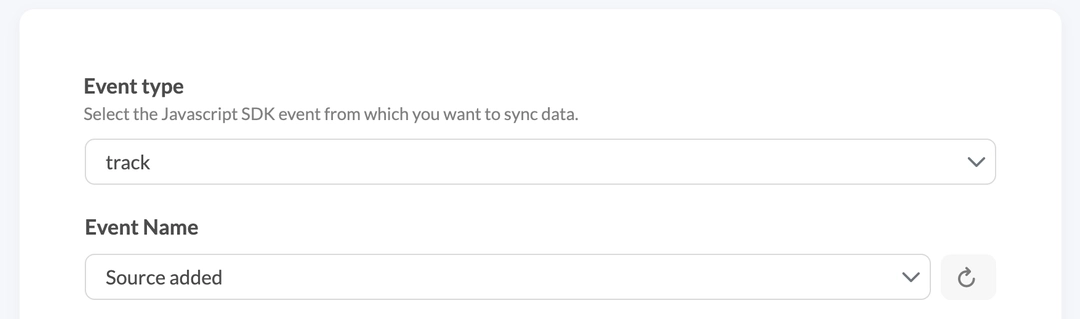
Event type
Specify the type of event from which you want to pass data to the webhook.
In my case, Source added is the name of the event, which is the first step in our onboarding funnel. This means that every time the user executes this event, we will activate the data stream on the webhook.
Filters
Filters allow you to add additional criteria for sending events.


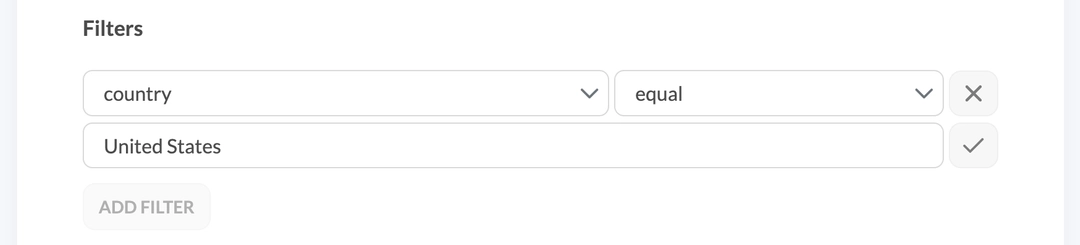
For example, you may want to send events only to users from the USA. To do this, you can add a filter: country equals United States.
Data Matching
This is the most important step. Here, you specify which event data should be sent to the webhook.


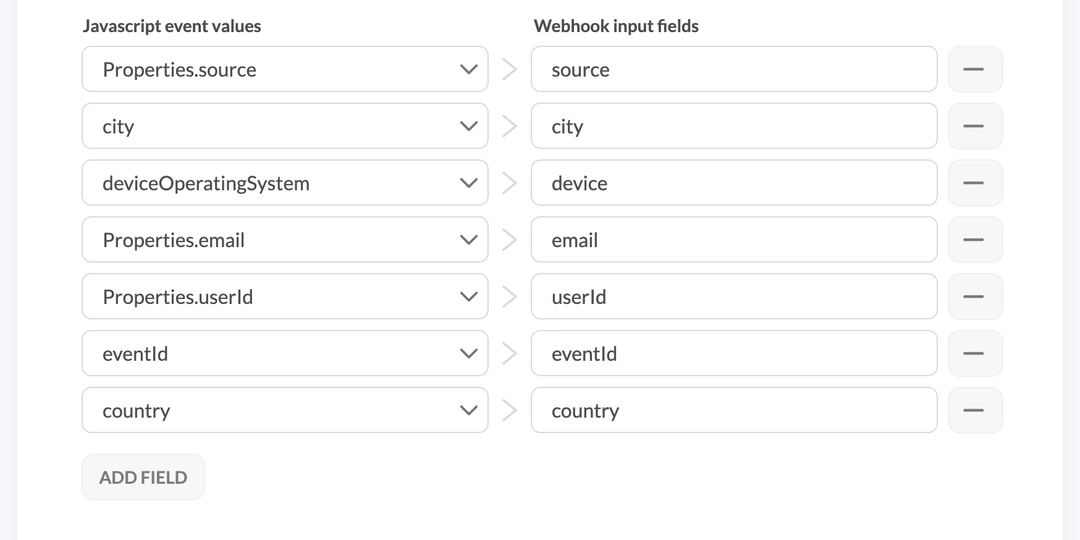
You can choose from standard fields such as country, device type, or UTM-parameters, as well as custom fields that you can configure when adding code to track an event on the site. You can also change the names of the fields you receive on the webhook side. And the last step is to click the «Create integration» button.
Done! Now we're all set and the selected data goes to the Pipedream webhook whenever an event we want to process is performed on our website.
Step 3: Creating an action in Pipedream
You can see the received data in your webhook trigger:


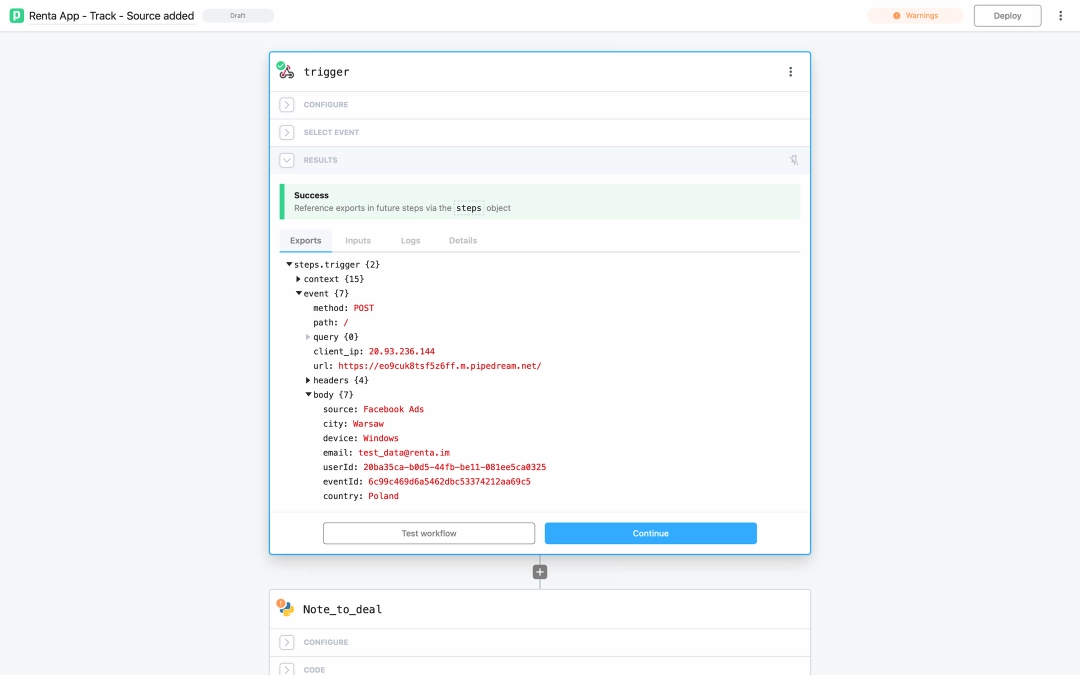
The data received from the Renta webhooks is contained in the body object.
When Pipedream receives data, we can use one of the many ready-made connectors or create our own logic using Python to stream data received from the webhook. I will use my own Python code to find and update fields for all existing contacts in Pipedrive:

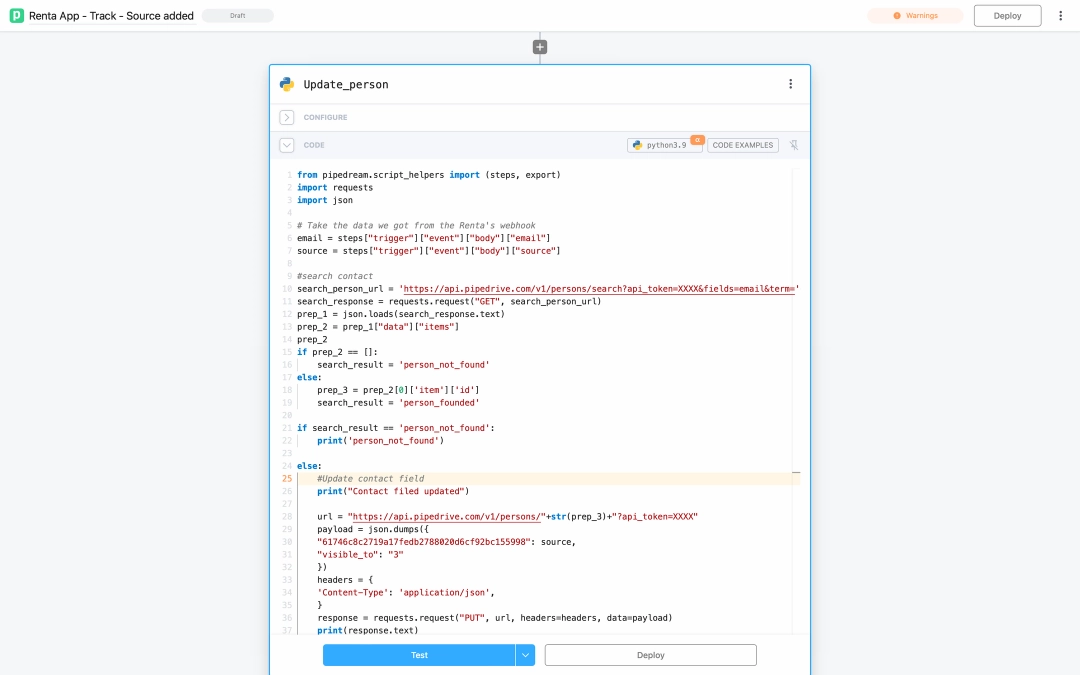
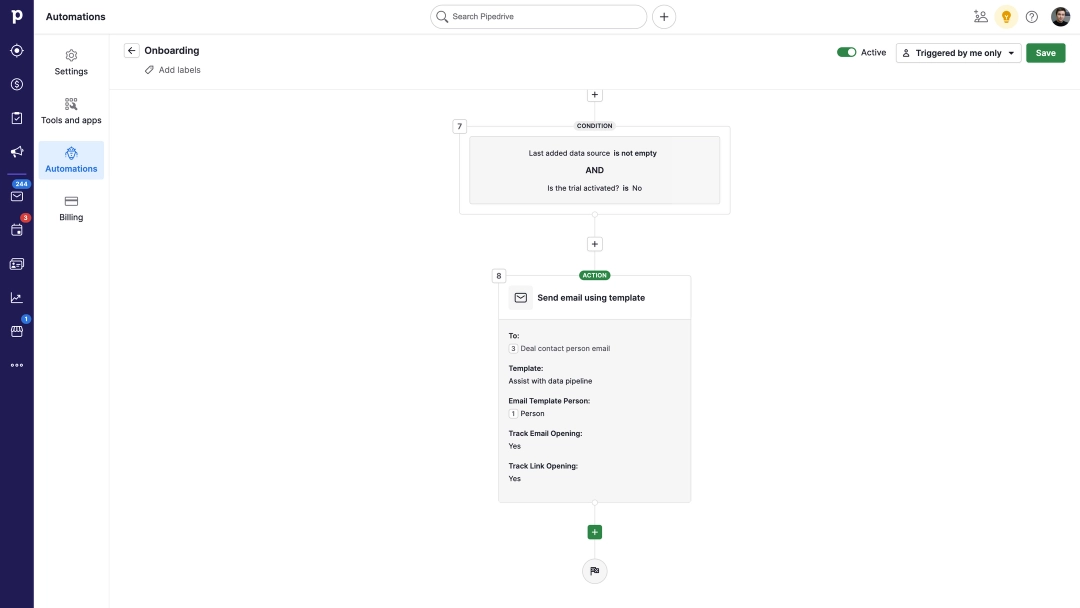
You can find the code example in the github repository at this link. Once the workflow is deployed, all the data I get from webhooks automatically updates the contacts in Pipedrive. Then you can build any type of automations based on custom fields using the standard Pipedrive functions.


What else can you do with webhook integration?
Sending personalized emails is cool, but what else can you do with these tools? Really, anything you can think of — the sky's the limit.
This is just one of the examples of using event streaming to help your business grow. There are many more ways you can use data tracking to enhance your customers' experience, help them through the process with your product, or create a personalized feed for them.
Here are just a few examples of what you can do with the Renta Javascript SDK and tools like Pipedream or Zapier:
- Notify your salesperson in Slack (or any messenger you use) every time a customer with an LTV > $1000 visits the website.
- Automatically create a task in the helpdesk tool, like Jira or Asana, every time customers face a repetitive error on the website.
- Build a variety of audiences based on user actions on the site in Facebook Ads using Facebook Convertsion API.
- When a user submits a form you can create a lead in Salesforce.
- Start automation in Mailchimp when a customer reach a specific action on the site.
As you can see, there are limitless options for your business to use first-party tracking for good. All integrations are server-side technology-based to provide full data control for GDPR compliance.


