
ClickHouse is a column database developed by Yandex to process analytical queries, which are ideal for solving digital marketing tasks.
We have prepared this guide to facilitate the start of digital analysts’ work with ClickHouse.
Table of contents
Video tutorial
This short step-by-step video shows how to install and set up ClickHouse in 3 minutes.
Server purchase for ClickHouse setup
To set up ClickHouse, you need to purchase a server that operates on Ubuntu.
As an example, let us consider server purchases from DigitalOcean.
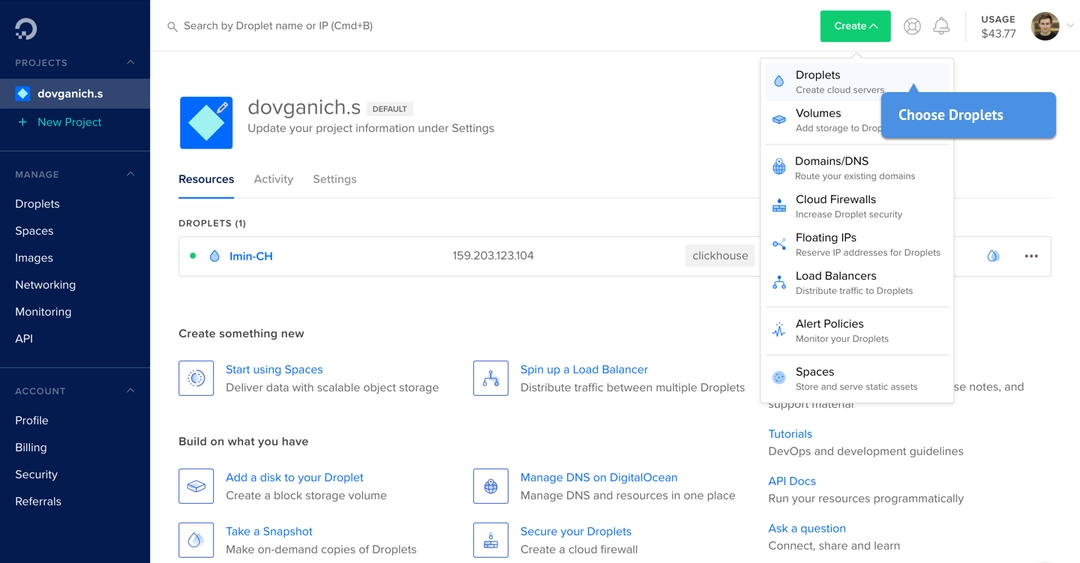
After registration, select Create Droplets:

Then, a server configuration page will open. Select the following settings:
Ubuntu is an operating system.
Version: 20.04.Amsterdam as a server location.
Specify the size of a virtual machine: 3 GB Memory, 1 vCPU, and 60 GB SSD.
As your data volume gradually increases, you need a more efficient server. DigitalOcean supports the server's scalability, making it easy to increase its technical characteristics.
After a virtual machine is created, you get an email with SSH access to the server.
ClickHouse installation
You can install ClickHouse with an SSH client and a few simple commands. Any SHH client is suitable, such as this Google Chrome extension or this client for macOS and Windows.
You must specify the server IP address and login to connect to a server. If this was the first login, you must also set a password after authorization.
Then copy the commands below into the SSH client console (we have also prepared the Google Docs document with these commands for your convenience).
Copy the code below and run the command in your SSH client:
sudo apt-add-repository "deb http://repo.yandex.ru/clickhouse/deb/stable/ main/"To do this, run the following command:
sudo apt-key adv --keyserver keyserver.ubuntu.com --recv E0C56BD4 # optional sudo apt-get update sudo apt-get install clickhouse-client clickhouse-serverThe setup is complete.
To start ClickHouse, run the command below:
sudo service clickhouse-server startTo make sure it was successful, launch the console client:
clickhouse-clientAfter that, execute a test query on ClickHouse:
select 1If everything is okay, then the query will answer with 1. Exit the client and go to the ClickHouse configuration.
ClickHouse configuration
To ensure further secure and comfortable operation of ClickHouse you need to set up the following:
Open the IP connection.
Right after setup ClickHouse is closed for connectionSet up Tabix.
Working with ClickHouse is more convenient via the graphic client Tabix, which is an editor of select queries.Create an account.
You need to create an account that you will use to access ClickHouse. By default, a password is not set up in ClickHouse.
Opening the IP connection
Server access settings are specified in the config.xml; to open it, run this command:
sudo naqno /etc/clickhouse-server/config.xmlAs a result, a file with ClickHouse settings will open:

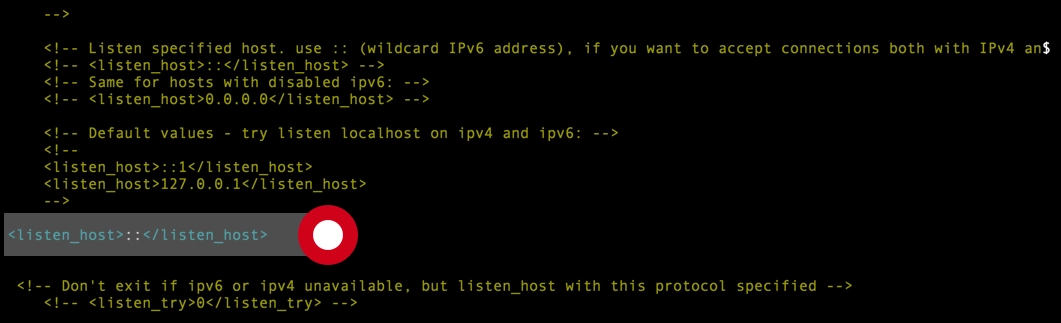
Uncomment <listen_host>::</listen_host>, then the connection from any address will be allowed.
Or specify the IP address if a connection from a particular IP address is needed. For instance, <listen_host>0.0.0.0</listen_host>.
Save changes by pressing the hotkeys: ^X.
Tabix set up (a graphic client)
To set up Tabix, you only need to uncomment the tag <http_server_default_response...>, in config.xml which will upload Tabix:

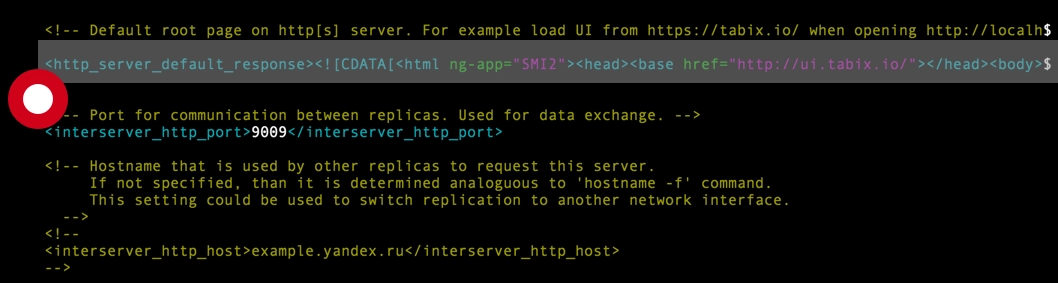
Save changes.
Tabix is loading via the link:
http://0.0.0.0:8123/
Where instead of 0.0.0.0 you need to specify the IP address of your server. By default, an account with the login Default is created in ClickHouse. Use it to enter Tabix:

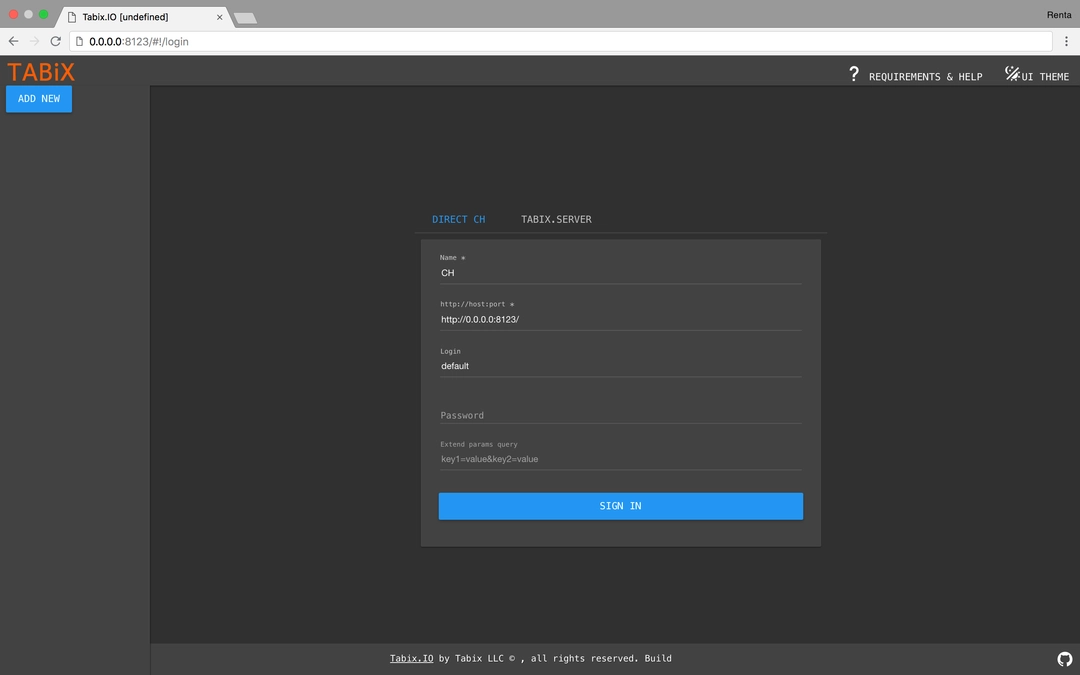
There is no password. To set up a password limitation, follow the instructions below.
User management
By default, ClickHouse creates a user with the name Default without a password. You can set up a password in an open or encoded way (SHA-256).
These passwords are no cure for potential fraud. They are more like protection from the staff.
You can generate a password with this command:
echo -n "testPasword" | sha256sum | tr -d '-'Where you specify the necessary password instead of testPasword.
After running a command, we are getting an encoded password.
To set it as your password, you need to edit the users.xml file.
To do that, run the following command:
sudo nano /etc/clickhouse-server/users.xmlA file with the ClickHouse user settings will open:

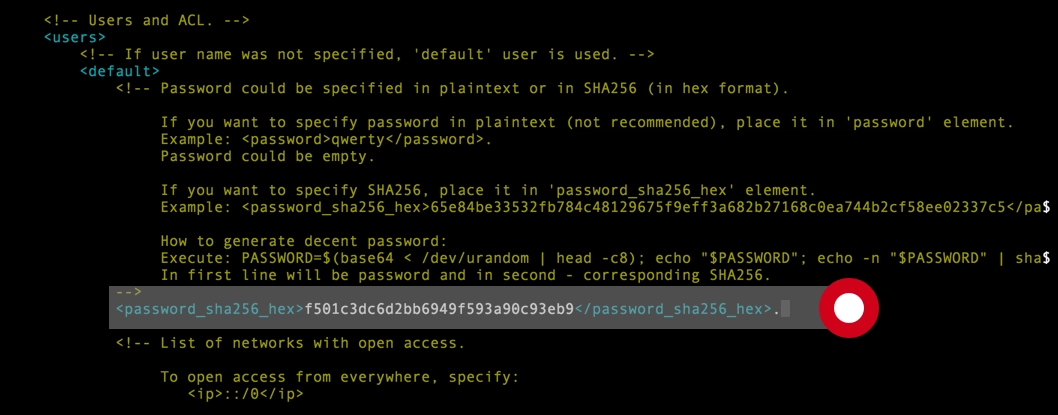
Where we specify the password generated for the Default user:
<password_sha256_hex>f501c3dc6d2bb6949f593a90c93eb9</password_sha256_hex>You can also specify a password in an open manner:
<password>testPasword</password>Do not forget to save the changes. From now on, to connect to Tabix, you need to specify the login and password.
Data uploading to ClickHouse
Renta allows uploading data from different advertising sources, analytics systems, and databases. For instance, from Google Ads or Salesforce.
A complete list of connectors and the setup process are described in the documentation.
Streaming raw Google Analytics data with an automatic merge of data from advertising sources, a CRM system is also available to ClickHouse.
Connection of Power BI to ClickHouse
You can connect to ClickHouse via the ODBC driver or through HTTP.
Making it through HTTP is more convenient.
To do that, select Web as the data source in Power BI:

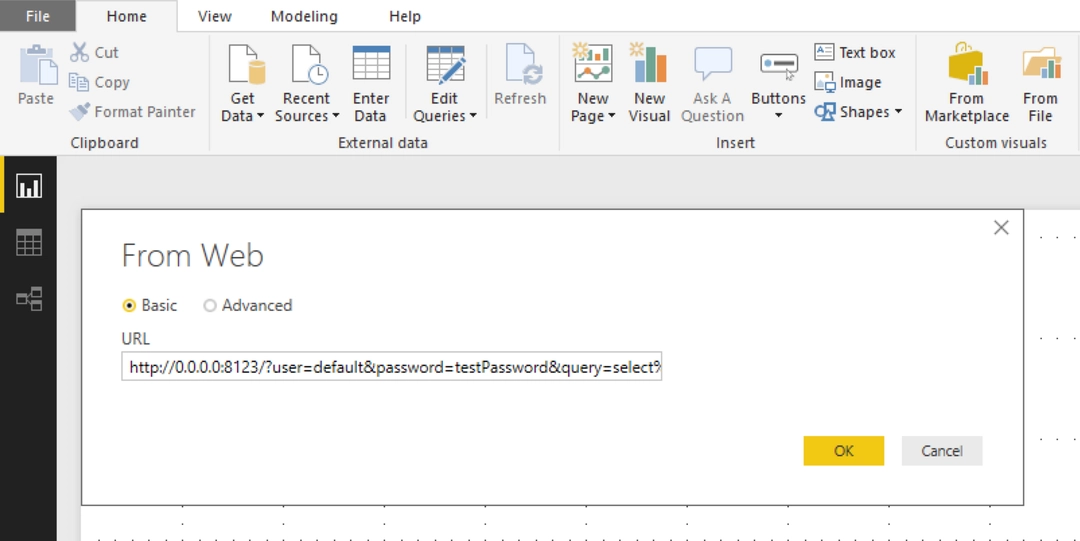
Then specify the following data:
The server address and port.
ClickHouse access credentials.
Select query (which will return the necessary data).
The extract format: TSV or CSV.
For instance, in Power BI you need to collect sessions count from advertising sources. Let us assume that the ClickHouse query looks like the following:
select
date,
source,
medium,
uniq(sessionId)
from renta_streaming.sessions_distributed
group by
date,
source,
medium
Then we prepare the URL, which will return the query execution result in the CSV file format.
The URL structure should look like this:
// specify server accesses
http://0.0.0.0:8123/?user=default&password=testPassword&query=

// Next is the sql-query:
select
date,
source,
medium,
uniq(sessionId)
from renta_streaming.sessions_distributed
group by
date,
source,
medium

//specify the file format
FORMAT CSVWithNames
As a final step, you need to transform the acquired query to the URL format:
To transform a query to the URL format, you can use any decoder.
Setting up an update in Power BI Online
Power BI Online requires setting a gateway to update reports in the cloud. But you cannot bypass this if you bind a domain to the server with ClickHouse.
Create a subdomain in the domain settings, and specify the server IP address as an A entry.
The setup is happening on the hosting side to which the domain is bound.
As a result, specify the domain as the data source instead of an IP address.
For example:
http://clickhouse.renta.im:8123/?user=default&password=testPassword&query=select%20%0Adate..Gateway setup is not required when using the subdomain.
Still have questions?
If you have any questions, write to our support chat.
We will be happy to provide you with answers to them.